Fast migration from Kotlin Synthetics to View Binding- Tips and Tricks
Android Kotlin Extension Gradle plugin is deprecated in favor of ViewBinding. That marks the end of too good to be true kotlinx.android.synthetic bindings for XML files. While synthetics were very convenient they had the following shortcomings
- They only worked in Kotlin and are not supported in Java
- They pollute the global namespace, as in every view is available everywhere in your app.
- They don’t expose nullability information
All of the above is solved in the new View Binding library. In one of my projects, there is heavy use of synthetics. In absence of an automated migration tool, it is a big pain to move every Activity, Fragment, View, Adapter, etc. to the new method of accessing views in a relatively large codebase. Also, accessing views consist of a sizable chunk of code in any app. It’s not a good idea to rely too long on deprecated methods for something this important. In this article, I am going to share a few tips and tricks that can help you complete this otherwise cumbersome migration in a faster and easier way.
Use viewBinding delegate
Using ViewBinding in a Fragment requires you to do the following.
class DemoFragment : Fragment() {
    // declare binding
    private var binding: FragmentDemoBinding? = null
    override fun onCreateView(inflater: LayoutInflater, container: ViewGroup?,
                              savedInstanceState: Bundle?): View? {
        // inflate and return view
        binding = FragmentDemoBinding.inflate(inflater, container, false)
        return binding?.root
    }

    override fun onDestroyView() {
        super.onDestroyView()
        // make it null to handle different view lifecycle in fragments
        binding = null
    }
}
While all you wanna do is this
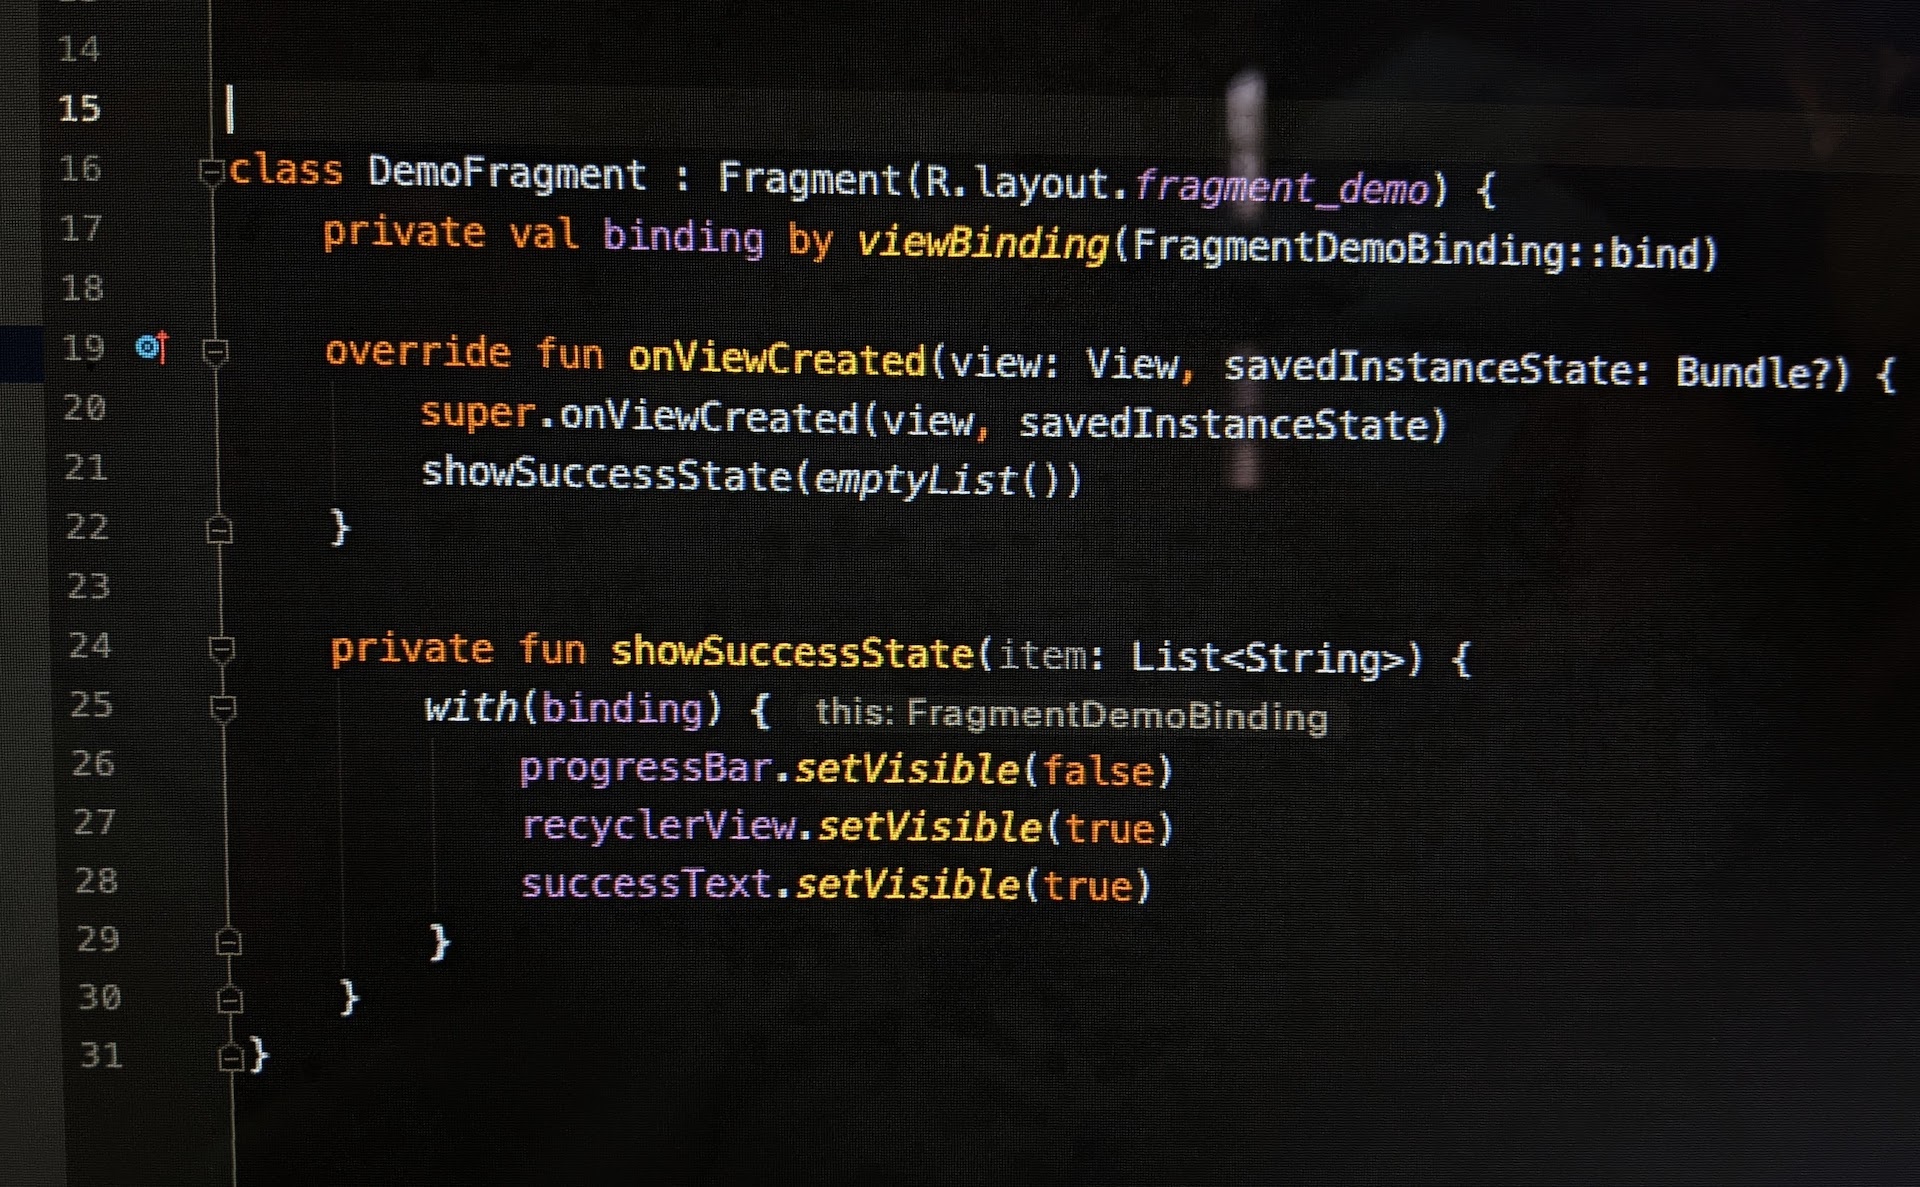
class DemoFragment : Fragment(R.layout.fragment_demo) {
    private val binding by viewBinding(FragmentDemoBinding::bind)
}
That’s lot less code. by viewBinding() is a custom property delegate by Gabor Varadi. Apart from syntactic sugar it also has added benefit that you don’t accidentally leave setting your binding instance to null in onDestroyView. Why you need to do that is explained in official docs here. I encourage you to read his post and understand how he has implemented this and how to use this in your Activities.
Consistent naming for ViewBinding instance
While basic it is an important step before we move on. I recommend that you name your View Binding instance consistently(in fact use the same name wherever possible). In the above example I have named it binding instead of demoBinding or demoFragmentBinding etc. I always name my View Binding instance binding in all fragments and activities. You can choose this name as you like but keep it the same everywhere. This is to make live templates work that we will see next.
Live Template for property delegate
We still have to go type this in every fragment/activity that we have
private val binding by viewBinding(FragmentDemoBinding::bind)
You could copy-paste this line every-time but it is faster to use the Android Studio Live Templates feature. New live templates can be created by going to Preferences -> Editor -> Live Templates. I usually create a new template group for project-specific templates. Create a new template group by pressing + on the right side of the preference dialog.
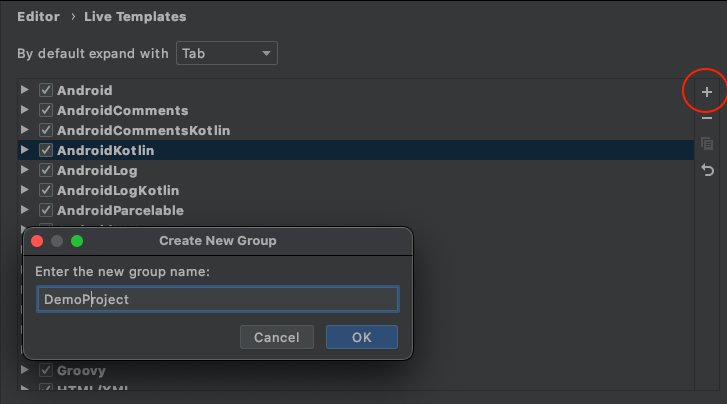
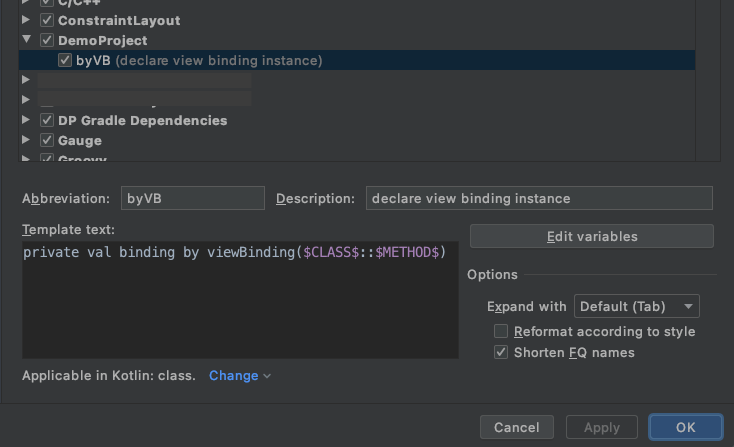
Now create a new template by pressing + again or copy an existing template to the newly created group. I usually copy an existing template but for purpose of this article, I’ll show how to create one from scratch. Next, you need to give an abbreviation for your new template. This is what you will be typing in the editor to access the template. I will name it byVB which is shortened form of by viewBinding. Put appropriate description so that other people in your team can understand what this template is about if you choose to share it. In Template text section put the following code
private val binding by viewBinding($CLASS$::$METHOD$)
This is what will automatically be typed when you select the template from suggestions in the editor. The last bit is to select context, context lets Android Studio know where to apply this template. Select Kotlin->Class for purpose of this template. Here is how final this looks
Let us see this in action

Isn’t that cool? That’s just a declaration of binding instance though. We still need to make changes in code such that all views are accessed via this binding instance. Let’s see how we can minimize that effort.
Use Kotlin scope functions where applicable
We declared binding instance quickly but what about its actual usage? We still need to access views like binding.textView and so on everywhere.
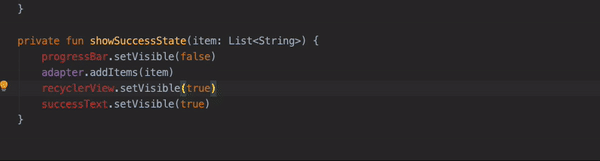
Let’s say you have this bunch of code in your Activity/Fragment somewhere
private fun showSuccessState(item: List<String>) {
    progressBar.setVisible(false)
    adapter.addItems(item)
    recyclerView.setVisible(true)
    successText.setVisible(true)
}
one way to migrate this code is this
private fun showSuccessState(item: List<String>) {
    binding.progressBar.setVisible(false)
    binding.adapter.addItems(item)
    binding.recyclerView.setVisible(true)
    binding.successText.setVisible(true)
}
But thanks to Kotlin you can do this
with(binding) {
    progressBar.setVisible(false)
    adapter.addItems(item)
    recyclerView.setVisible(true)
    successText.setVisible(true)
}
with is one of the scope functions that language provides us. You might also need to use binding?.apply {} at times. Read more about scope functions here and here
If you are thinking that its too much work to type in that with and then move existing code inside {} block, stop thinking and read on.
Use Live Template to insert scope functions
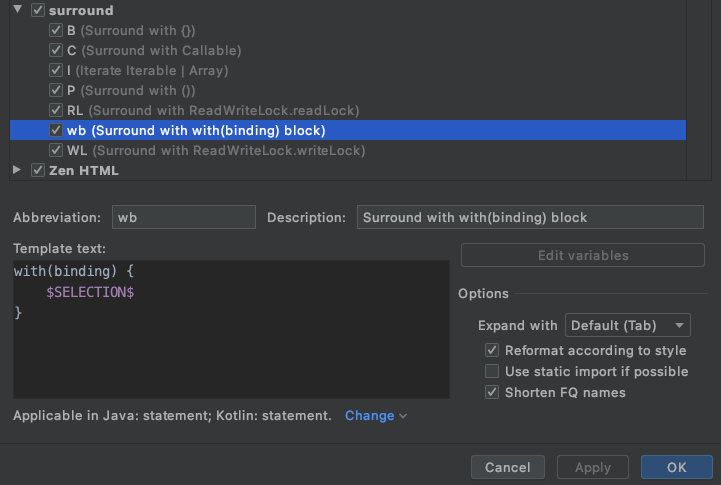
If you have worked on Android Studio for some time you know that you can select a bunch of code and then press CMD+OPT+T (ALT+CTRL+T on windows) on mac and open a context menu that lets you surround that selected code with blocks like if, if/else, try/catch etc. We are gonna create a similar template for view binding with block. This template needs to go in a special template group called surround. Since we have already gone through the process of creating a new Live Template I will just show important bits here. Here is the live template code that we need to put
with(binding) {
    $SELECTION$
}
similarly, you can create a template for apply case.
binding?.apply {
    $SELECTION$
}
Here is the final configuration of this template
Here it is in action
Once you are done with removing all synthetics from your app don’t forget to remove following piece of code from build.gradle file. In android block
androidExtensions {
    experimental = true
}
from top
apply plugin: 'kotlin-android-extensions'
If you are using @Parcelize annotation in your app follow this.
That’s it, folks. This workflow helped me in boosting the migration speed by 2x to 3x. I hope you can gain some speedups in your workflow too. If you have a trick up your sleeve as well then do share.
Happy Coding!